

Zoey and I went to the Dollar Depot store here this past Friday evening and scored big time! We will share our other finds in another blog post but for today we want to share what we made using a foam kneeling pad, some felt stickers, a shoe lace and 4 buttons (buttons not pictured). These items found at our dollar store totaled a grand total of $3.00.

As the photo above suggests, we made some lounge chairs for the dolls. With spring break coming up here quickly we are getting them ready to enjoy some time away...somewhere warm. To make lounge chairs of your own for your dolls you will need to poke four holes into your kneeling pad. It's really easy to poke through the pads, we simply took the end of a paintbrush and pushed it though to make our holes.

For the top two holes we went down about four inches from the top and poked our holes.

You can also set your doll on the kneeling pad and bend it up so you can see where the holes will be in comparison to your doll. I'm a very visual person so that helps for me!

For the bottom two holes we went up from the bottom edge of the kneeling pad about six inches and poked our holes even with the top two.

Starting with the top two holes, start threading in your shoelace (shoelaces work great for this since the ends are coated in plastic and will poke through the holes very easily).

You will thread your buttons onto the back of your lounge chair, knotting on the side facing away from the back of the chair (allowing your thread to remain tight and not slip, making your chair collapse). See the following pictures to get a better idea of what I mean.

You are going to make sure that your lounge chair is curved a bit more than you think you might need it to be since when your doll sits in it she will push it back a bit and your chair has some give to make it lean back more than you think it might.


This is what the back of your finished chair should look like:

This is the front:

Now for the fun part...decorate your chair any way that you want with stickers. We found some felt flowers that had stickies on the back at our dollar store. They were a pack of 12 for $1.00!

Here is how we used our stickers...

See how the backrest leans quite a bit forward, that's alright because once your doll sits on it, it will start leaning back and hold her perfectly!

See, here is Zoe enjoying her new comfy lounge chair!
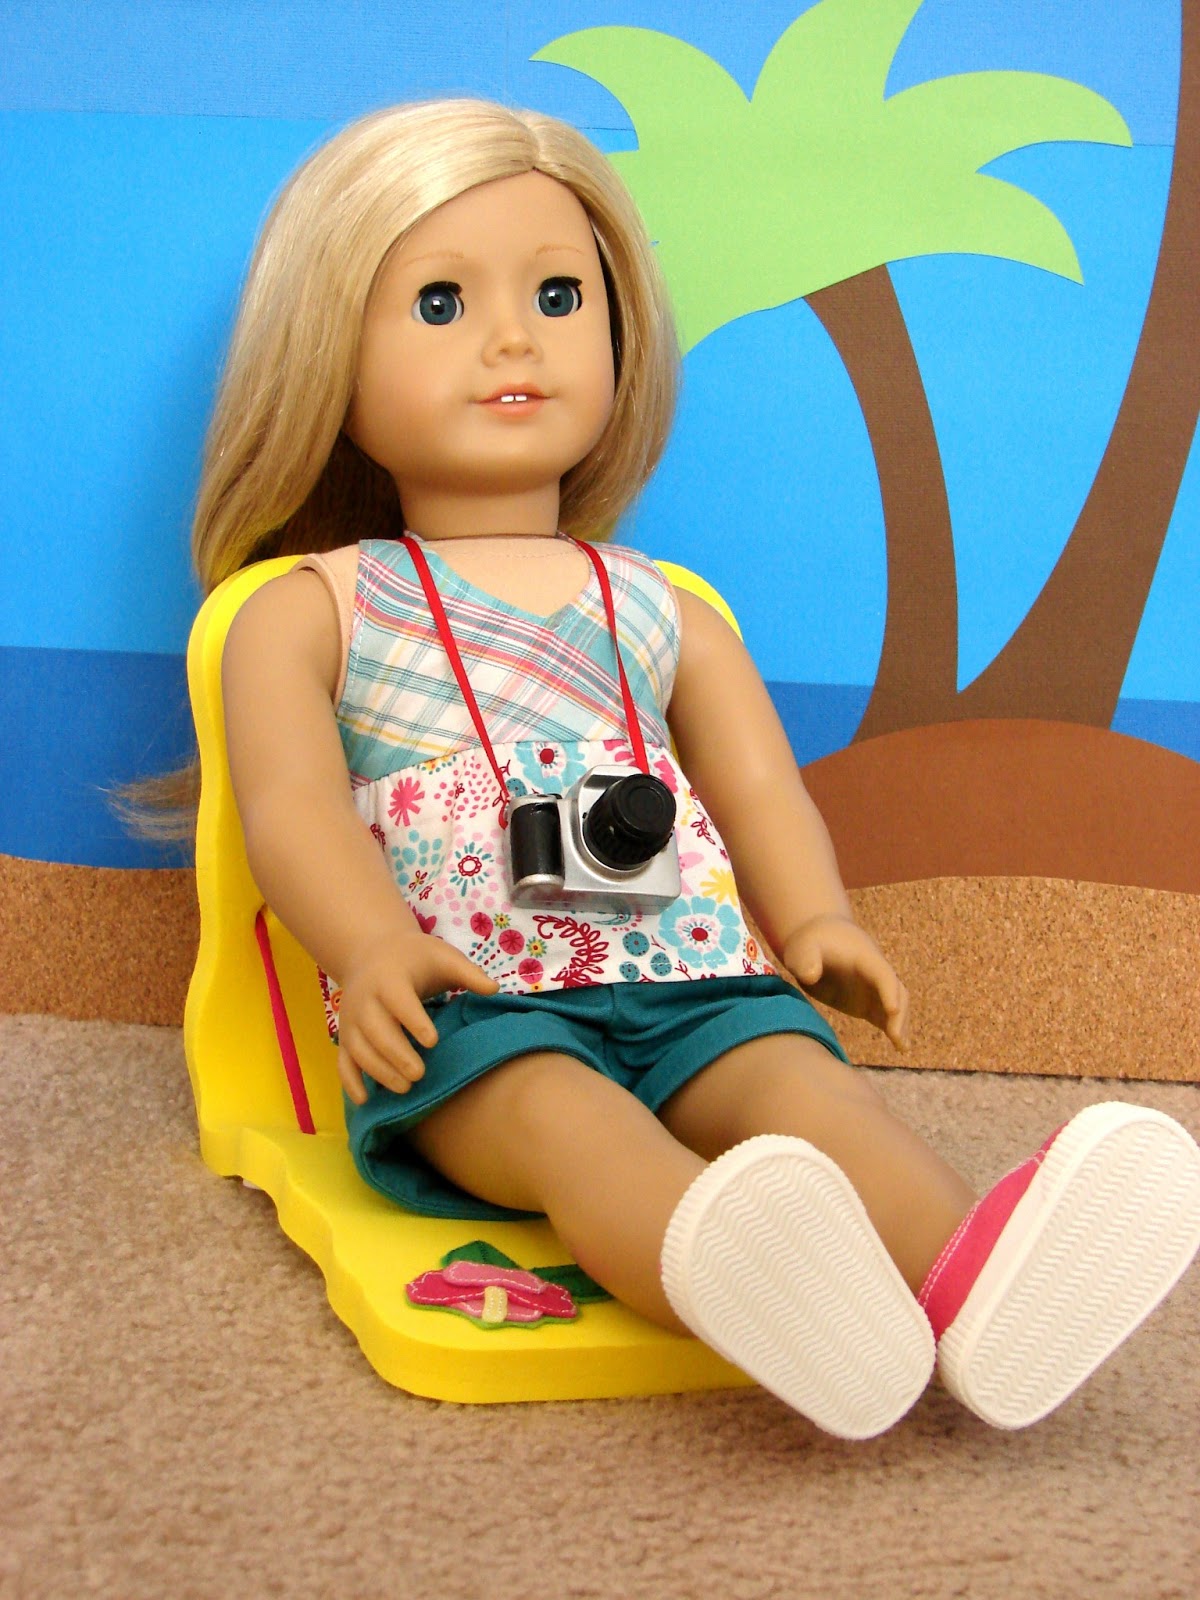
She loves it!


We made one for Kristen too...two girls at the beach, what could be better than this?


We hope you enjoyed this craft! It's super easy and if you can find your materials at the dollar store, it's super cheap too!

Happy crafting!

very clever idea! the result is super cute, my daughter will be asking to make these chairs, the difficulty: finding the board!
ReplyDeleteI am really enjoying all of your ideas lately, even if I rarely take the time to comment....we (my daughter and I) appreciate all of your doll craft.
(having to do some crazy word recognition to leave a comment is not fun! sorry!)
Oh my goodness Jen- this is the cutest little chair ever! I am going to run to Dollar Depot as soon as the girls get up!!!! I wonder if someone was having trouble finding the kneeling pad for gardening, would it work to use cardboard with a layer of craft foam glued on the front and back? I love the backdrop too!
ReplyDeleteThank you Morgane! I will see if I can change the comment verification issue for you and for others, I appreciate that you left a comment!!
ReplyDeleteAmanda, there are a ton of different colored foam pads at the dollar store right now...have fun! And yes, for those that can't find those kneeling pads locally you could use cardboard and cover it with something.
Love this!!! I am going to Dollar Tree today. TFS
ReplyDeleteSo glad that this project inspired you! If you make one be sure to share the photo on our facebook page, we would love to see your version!
ReplyDeleteThis comment has been removed by a blog administrator.
ReplyDeleteVery cute project! Btw, did you make the little sun umbrella? It's cute and would love to see how you made it!
ReplyDeleteVery cute project! Btw, did you make the cute sun umbrella... would love to know how you did!
ReplyDeleteYes I did Annette, I actually used my Silhouette Die-Cutting machine to cut out the umbrella template, which I then folded and glued and stuck to a dowel.
ReplyDeleteIs Kristen a #55?
ReplyDeleteDid you make the camera too?
ReplyDelete
ReplyDeleteWhat a great idea! Love it!